Tuesday, May 31, 2011

In the City: Fail buttons


These are shots of our fail buttons. They don't really work and James suggested that we get smaller buttons and just put the plat on top. Which is so much simpler than the route we were going down. This has happened a few times now, when we do something but there's a much much simpler way to do it.

So it's supposed to be mounted inside the case only with the metal plate in view through the large button hole.


Pole here gives the button push action a linear movement.


But there were problems with the pole apparently.


Between the plate and the wood there are supposed to be sponges attached so that the button can bounce back and disconnect.

However, we won't be using these anymore as they're non-functional and there's a simpler way to get huge buttons as described by James.

Friday, May 27, 2011

In the City: Output inspiration

Spirographs got ditched again for output ideas because we couldn't find a conceptual meaning for it and we felt that it didn't represent audio well enough. So we went around on YouTube to look for inspiration. I'm hoping to find a beautifully simple solution that's really unique when you repeat each instance of simplicity like in fractals.

Below are some ideas that might inspire us. These are more to do with the vibration of audio directly affecting its physical surroundings. Output can be physical:

Fluid and speakers:


The one above is my favourite one out of the lot. We're thinking that the vibrations affecting something in the environment directly would be absolutely amazing. Here is a fluid speaker made by an artist. More information in the YouTube description. This fluid speaker was put in a room full of people and according to the people's speech the movements of the water would change after the speech has been converted into a suitable frequency to cause water to move in that way. This is human speech seen in the physical form. When applied to our project, that would be the physical form of radiowaves and communication. However, the problem would be getting the right kind of vibration with our speakers to reproduce the same effect.


Light weight particles and speakers, such as rice:


Light with speakers:

In the City: Developments

The idea for the interaction device is developing. Now that the cases are being made, at the same time we're trying to figure out and decide what to do with the output. The programming is underway, just need to find a way to express that data in a meaningful way. At the moment, we're thinking of translating that data into spirographs. But more thinking will be needed to get an interpretation that feels right for the group.

From this project it seems like we're struggling with being conceptual and experimental. I think it's probably a mixture of trying to find something that we can work within the deadline and maybe it's the way most of us were taught to think in school that's preventing up from thinking conceptually. However, I'm sure that this would change in due time, because it is possible to change the way you think by changing your mindset. Also, enough determination can make anyone do anything. I think once we get used to thinking conceptually and do that more, it will become second nature. It's like when you start off making art. You know it's going to be crap art unless you keep going with it and improve over time.


Anyway, the button holes for the cases have been cut, from what I saw when I came in this morning. One of the edges haven't been smoothed out yet, I'm assuming Tom and Emile are going to go back and smooth them out today.


I also see that they've grinded down the edges too. I think after this, they will then get on with the back of the case, which is to give it a rounded curve at the back to make the cases fit on to the pole snugly.

Thursday, May 26, 2011

In the City: Making more cases


Yesterday Emile and I went to the 3D labs to make the remaining cases and drill in the holes to the lid. Now all four cases and lids are done. The next thing to do would be to weld the lid to the case. I'm not usually the other fabricator, Tom was away doing light design so I went instead.


Emile did counter-setting for the holes so that the edges get smoothed over. Makes it look cleaner.


We both did some spot welding. I did this one, which melted through the metal >.>


Today Tom and Emile went to weld the lids and cases together. Some of the welding wasn't very clean, but that's fine. We can fix that with a grinder to smooth up everything and get the lids to fit on perfectly.

Wednesday, May 25, 2011

In the City: Circuitry

My job in doing CAD is finished, so from now I'll be doing whatever is needed of me. So unless anyone else needs help I'll probably catch up on work from other papers and document anything important that happens in our progress.

Anyway, our progress pace is still going pretty well. Tom did the circuitry we needed for our transmitters and receivers.


I don't understand what most of the parts do unless it's really obvious such as:

-Huge black circles = the bit where what you're saying comes out

-Little circles = changes the channel you're on, so you'd want a blank channel to use and not a channel for a particular radio station

-Tiny silver cylinder on yellow part = the place where you speak into

Also, since the CAD drawing got approved yesterday Emile and Tom started fabricating as soon as they could. So far we've got the all four lids and two of the cases (but still need to make the curved back and need two more). Holes will need to be drilled in for buttons and listening/speaking holes and need to figure out how to make it aesthetically when we're done making it.


To be honest, now that my CAD job is finished, I'm a little lost on what I should do and feel a little useless because I have nothing to do. Hopefully my teammates would have things for me to help them with because I really don't want to bum around and do nothing. So maybe I'll help with some fabrication and anything else that I can do. In the holidays I want to practice some more programming somehow, so that in future groups I can help with programming too. It's an area that I'm really weak with so I want to build that up to make my value as a team member become greater as there is a shortage of programmers in the class.

Tuesday, May 24, 2011

In the City: Finished CAD and drawing

This is what the entire box looks like when it's fully assembled. I rendered it in glass so that you can see the hollow and sides properly.

The drawing for it is finished as well and was handed in yesterday morning. The design got approved but some changes had to be made to make the drawing easier to understand. So today I made an improved drawing of it, which I figured out how to do. It turns out that you can right click and show all the hidden edges. Which means I can now have the hollow, holes, and length of screws shown in every drawing so that it's easier to understand.

The making of the CAD went surprisingly well. I think it's because I practiced quite a bit on SolidWorks to get used to the program and learn its tools first before making the real thing. I find this useful, it's like in the previous project where I practiced soldering for a long time to get it right the first time.


So far we're doing pretty well, just need to get fabrication up and running so that we can collect our data on time. This project is great too with very distinct roles, this makes the workload much easier to handle compared to previous projects. Especially since so many things are due all at the same time before the end of the semester.

Friday, May 20, 2011

In the City: Making the actual CAD

How to make a screw:


How to make easy screw holes:


Screw mates:

http://help.solidworks.com/2010/english/SolidWorks/sldworks/LegacyHelp/Sldworks/Assem_1/Screw_Mate.htm

I finished the lid and the case, just needed screws. I was halfway through completing a practice screw when Ben tells me that there's preset screws when you get into assembly. Good thing he did! Because that would save up on a lot of time since making your own screws takes a while to finish and get right especially since I'm new to this. So I'm going to keep it simple, I'll add in the holes, but use the screws and things in assembly. Will need to figure out how to do that.


This was the screw I was half-way through making when helpful classmates said that it's ok not to make screws as long as the drawing is really clear with where everything goes along with the sizes. So I was rather relieved because this took a long time to make, the helix was fun to make though.


This is the case of our box that I made, the bottom is the lid. For the snowflake pattern for the listening/speaking holes I couldn't get the dimensions to show up. That's fine though, because we can laser cut that and draw the pattern on another surface to get the positions and sizes right, then reattach it to the main body.

Next is adding in screws to pull everything together in assembly.


Thursday, May 19, 2011

In the City: Practicing with SolidWorks

Did a bit of practicing on SolidWorks to become more accustomed to how things work in the program. We don't have a definite design yet so I made a simple box to practice on. This is the end result.

The huge hole at the bottom is for the button and the collection of holes at the top is the part where the sound comes out and the place that you can speak into to use the crossing phone box. I wanted to make the listening/speaking holes more interesting so that the design doesn't look so serious that people might not want to interact with the box to activate the device inside.

Will still need to work out how to make screws, the design and measurements to get on with the real drawing. This practice helped a lot to understand the program though, like when I practiced soldering heaps to get it right and get comfortable with doing it.

Wednesday, May 18, 2011

In the City: Designing the box and electrical bits


Did some testing to understand the geometry in origami for tato boxes, which can collapse to small sizes and close the top very quickly depending on the type of box, to see if we can apply that geometry into our design. I looked at origami diagrams like the one below to get an idea of what the geometry is like, then made my own versions/collections of folds (above) to test them out. The results are above, which will be included in my journal also.


But in the end we decided that applied rigid geometry would push our costs up because it would require a vast amount of hinges to get the fold right for each panel of wood or metal. Also, it is highly likely that the angles would be off and we would have to remake the entire box all over again if that happens because the geometry's precision in measurement and position are very important to get the shape right. So we're opting for a simpler box design.

Tom did his own experimenting too with the electrical parts that we're using. We made a lot of progress today. I want to get the measurements and design decided by the end of tomorrow so that I can get right into CAD work. Hopefully, because I probably won't be able to work on it in the weekend since I'll be doing 48hr film.


I think the progress we're making is fantastic, from here it looks like things will fall into place provided that we keep this pace going. I don't know why, but it's a whole lot less stressful than I thought it would be.

Tuesday, May 17, 2011

In the City: Applied origami


We're back to the crossing interaction idea where we have a box housing a microphone, speakers, and FM transmitters to let pedestrians waiting at crossings to communicate with each other almost anonymously while they wait. The idea is breaking the isolation felt within cities. Humans are social creatures, but when we're put in a crowd in a city it feels like you want to interact with people, but you're so trained in being suspicious of people in cities that you end up not doing anything with other people at all unless you personally know them.


I'm focusing more on making the box, since I'm the CAD person. I was thinking we can apply the mathematics of orgami into the design of our box. It would make it compact, easy to load and unload components, and convenient to transport. This is the goal. It gives a lot of room to explore design opportunities as well and lets us experience creating designs that are in touch with changing technology. This is because origami geometry is being applied more now in designs of airbags, telescopes, solar panels, even biology. So I think it would be interesting to try out origami geometry in our design.


For us, we'll probably need to do rigid origami to apply to our design. This is where you have rigid materials such as wood, with hinges attached in specific locations to allow it to fold up to create a 3D form, become compact, etc like ordinary paper origami.


Examples of applied rigid origami:
http://www.origami-resource-center.com/origami-science.html

My favourite example is the eyeglass in a telescope. How when it's all folded up it's tiny, but it expands and flattens out into a far larger form.

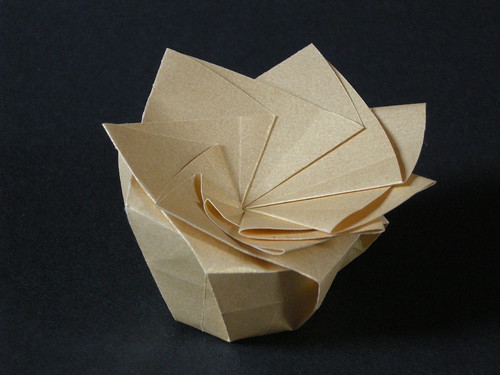
Examples of built rigid origami pieces to show that it can work:


More examples of how bits can be made together to shrink and grow:


This one isn't exactly origami, but it shows some really interesting geometry:


A very VERY fine example of applied origami below. It's an entire room made of origami components for an architecture paper. This shows origami being applied in various fields.


Instructions for various tato boxes for me to try out and understand the geometry to make a wooden one:

http://www.origami-resource-center.com/tato.html
http://www.flickr.com/photos/melisande-origami/collections/72157600035377677/


James talked to us today and said that it's best not to hop from one idea to the next. It's better to stick with one favourite one and develop that fully instead of discarding it. I agree with that, that was probably our problem because we went all over the place with our ideas and didn't find anything that stuck. So in the end we went back to the interaction one explained at the top which we all liked.

Saturday, May 14, 2011

In the City: Doesn't feel right

This is going to be a short entry. Blogger was down for a while so I couldn't do anything, however, there wasn't much to write about anyway as we're still stuck on ideas.

We came up with a million different things including an interaction device that's meant to provoke the public into pressing a button. Our favourite idea for that one was having those machines paired up so that when you press it you're talking to another person somewhere else on a different crossing in the city. It exposes that isolation felt in cities because there are strangers walking around who would not care about you because they don't know you. But it didn't feel right for the brief. With getting an idea/concept, it's important to just let go and forget the restrictions to let imagination run through and take over first before adjusting it to suit the brief and limitations. I think this is what we lack because we're afraid of letting go. We need to follow more of our gut instincts.

There were a lot of ideas but none of them felt right. But I have a good feeling that an idea will come at the end of Sunday.

Friday, May 13, 2011

In the City: Examples and some themes to think about


http://www.bewitched.com/song.html
A beautiful visualisation of music as circles. The above is Mozart's Jupiter Symphony. The shape is really aesthetically pleasing, though I may be biased in that since circles are my favourite shape and I consider them the perfect shape.


http://flowingdata.com/category/visualization/artistic-visualization/
Has really beautiful examples of data visualisation. My favourite one is the one above by David Wicks. It's about where rain falls in the US and where it is consumed and from that data you get the beautiful visual.

My absolute favourite of all the data visualisations I perused is the We Feel Fine one. It tracks whenever anyone types in "I feel" followed by a feeling and then takes that word and turns it into a coloured dot. Then in the app for We Feel Fine you get a cloud of dots from people around the world. Clicking on a dot gives you the whole sentence from their blog which talks about the feeling. You can even adjust the settings to show feelings for specific ages, genders, weather, date, and any specific feeling. I know it's probably mean but when I feel horrible I now go on it and look for people who are feeling depressed and suicidal so that I can see how much more horrible they feel compared to me, then feel a whole lot better because somebody's having it worse than I am. I think it's that curiosity of wanting to know what other people feel like and the sense of not wanting to feel alone that makes this visualisation so attractive because you can see what other people are feeling like and how many people feel the same as you do.

I think the stress is getting to me because my brain's just not working. It's not producing enough creative juice to give me that burst of inspiration that I need to help my group secure an idea. I need more sleep and let go of everything. Maybe meditating would work.

Thursday, May 12, 2011

In the City: Solid Works tutorials


I'm new to SolidWorks so I found some tutorials in advance to help me when I work as the CAD person for my group. No doubt these will all be used at some point and I want all the help I can get to be there when I want it. I picked out the best tutorial websites I found and posted them here.

http://www.solidworkstutorials.com/
Has a wide range of tutorials specially with parts like screws, and bolts and some of the more complex tutorials like how to model a car (above). This would be good for small parts and to understand using tools in SolidWorks for more complex forms.

http://www.solidworks.com/sw/resources/solidworks-tutorials.htm
Has video tutorials directly on SolidWorks website. It goes through the basics and would be easy to follow because it's in video form.

http://www.solidengineering.co.nz/solidworks_free_tutorials.htm
This site is good for more complex curved forms like spring coils and assemblies with many parts. It doesn't have a lot of tutorials on it though.

http://www.solidworkslessons.info/
Out of all of the good sites with tutorials I think this one is the best one. It ranges from beginner's level to complex objects and tells you exactly what everything is for and explains tools in depth. Everything is compiled in one place.


I think if there's something you're not sure about in a program it's best to compile the best tutorials in advance so that when you get around to doing your work you won't have to waste time looking for them because they'll already be here. It's all about getting prepared to save time. Time is a huge issue as always with all projects. I think it's especially important now with 2 other huge projects from out other papers due in at the same time. That is stressing me out to be honest because I'm behind with one of them.

Wednesday, May 11, 2011

In the City: Groups and a bit of research

First, I'll talk about what we did yesterday. We did the bullet time effect in our own way. Which is when an object is filmed at multiple angles while it is in distorted time. We peresented that today and I was really proud of what my group came up with. I think we did the best, our one was the one with the paper ball being thrown around the room. The video will be up on youtube soon, so I'll put the video here when it's up.

EDIT (15/5/2011): And here's the video =D


Today there was an introduction to SolidWorks, and the brief. The brief is to build a device for the camera to capture film in ways we normally couldn't and use the visuals/audio it collects for reinterpretation as something else such as audio, objects, machinery, etc. SolidWorks is for a 3D plan of the device.

In my group I'll be the one using SolidWorks, it's hard at first but I know that I can understand the program and make it work if I work with it more. Also, the group for this project in my point of view is yet another amazing team. I think with each member we're perfectly put together and will work very well as a team. I was worried that I wouldn't get a group that wants me because I've never welded before though I'd like to learn how to weld, I'm no good at programming, and I know nothing about CAD or SolidWorks. So I'm really happy that things just fell into place for me at the end.

We did a little brainstorm after class for ideas and my favourite ones were about time and the invisible things in daily life that have always been there, like in Richard Hammond's Invisible Worlds:


And something so slow that we can't see it is the path of stars. I.e. The rotation of the Earth:


However, we can't do the really fast ones because our cameras won't be fast enough to capture images like in the Richard Hammond example. I think maybe we can capture things like the movement of water trickling off city buildings, things falling, and stuff like that that aren't extremely fast. We can do the stars one if we wanted, but with city lights. But that requires a hacked still camera instead of a normal moving camera. Although we can't do those two things I think these examples really show us the idea and perception of time. I think time here is a centrepoint in this huge project that we need to manipulate in the data and reinterpretation.

A cool idea that we all agreed was good was using mirrors on our device to capture many different perspectives. This is when we have mirrors angled in different positions and maybe using concave and convex mirrors as well. Another idea I got from that was the infinity mirror when you have a pair of mirrors parallel and facing each other. Then when you put something in the middle you get infinity.

Here's an example:


With the tutorial above we can make two one way mirrors with perspex/glass with window tint applied to one side and put the camera in the middle to capture infinity. We can even blow up the scale to be like a room and people walk through it and are captured in the camera and in infinity. That puts an extra layer of interaction in the device.

Some themes that we thought about were experiences of a blind or deaf person in the city. I thought of more later about being a synaesthete. This is when you have 2 or more senses combine into one. For example, certain synaesthetes can literally see a sound or taste a colour. There are many combinations. Though little is known about this phenomena, there is growing interest in researching this area. Another theme I thought about was Alice In Wonderland Syndrome. When your perception of space is extremely distorted. For example, you wake up one morning and your room seems incredibly small and suddenly your dog is at such a monstrous size it's towering above you. This would be really interesting to play around with in capturing data.

Saturday, May 7, 2011

Wearable Tech: Video and conceptual statement


Ok, here's the video, hopefully it works. Lost my voice today so I had to type in what I wanted to say instead, hopefully it'll be back tomorrow.

For the project there's so much to talk about in this conceptual statement. I think the biggest issue was motivation and time management really. Since this project was individual and bridges over the holidays there's so much temptation to procrastinate. Also, because it's individual nobody's depending on you to do anything, which means less motivation to actually get in there and get productive. I think that was a huge issue for me, I never want to procrastinate ever again to be honest. Another idea is patience and practice. This was especially evident in soldering. Lots of people had to get more keyboards because their soldering burned out the ones they worked on. I didn't want that to happen to me so I did a lot of practice in soldering so that I can get it right the first time with the real board I'm using. What I found while working on this project is that taking numerous little breaks while working is far more effective than working on a project 10hours straight. At one point I wouldn't stop working on the project, eventually I got really tired, my brain got frazzled and I couldn't work anymore. I had to take a break. With taking heaps of small breaks you let your mind rest and leave the project for a little while. So when you come back it's easier to dive right back into your work. It doesn’t matter how much you plan, the end result will always be different to what you had in your plan. Even when I drew up developments of the designs when I got to making it in the real world off the drawings there were some aspects I had to change to make it work. A great example of that is the connector on the zip.

Friday, May 6, 2011

Wearable Tech: Presentation day

Today was presentation day. There were definitely some favourites of mine that other people presented. I'll start with them first.

The ones that REALLY stood out to me was Jenny's musical skeleton. I loved the sounds that came out of it, it was all twinkly. I quite liked the idea of it along with the puppeteer meaning behind it.

The other one is Corey's giant dental helmet thing--I don't know what they're called. I really liked that one because it had this amazing 3D interactive space in the patch so when you tilt your head it looks like you're traveling through the space. I liked how it was like the game marco polo when the person is blinded and has to find people with their voices. It's a bit like that only that the people are guiding you to a specific point in the space.

I noticed that lots of people didn't present though and most people weren't really finished yet. I wasn't finished yet either with the patch even though the actual device was made.

I'm proud that I presented anyway instead of hiding away, but I'm still very very disappointed in myself because I didn't meet the deadline and I know that I could have done better if I had not fallen to procrastination. I won't blame anyone but myself because it really was my fault. I still need to finish the patch, but I won't update on that on the blog since it's a policy of mine that if the deadline has ended there will be no further updates on the project unless it's a reflective statement or evaluation.


I'm determined not to procrastinate for the next project. I want to sleep and I want to make free time, to do that I MUST stop procrastinating. Before when I didn't procrastinate everything was fine. But now it's a real problem. I'm on top of intro to creative technology with the journals and all, but with programming for creativity it's a completely different story. I'm so behind on exercises it's no longer a laughing matter. I refuse to lose sleep over this and I refuse to give up and fail, therefore I will work hard trying to finish those exercises as best I can.

Thursday, May 5, 2011

Wearable Tech: Adding the sound to the patch


Got the transitions between standoff scene and pictures sorted out with all keys attached. All there's left to do now is figuring out how to attach fullscreen and audio to the patch. I got Sam D's patch, which I thought was cool because it makes annoying noises that give you headaches after a while. So I'll probably build my audio on that with some adjustments. Later Tom also had some cool audio stuff as well so I wrote down what his patch was like. I think I'll use a combination of their patches, Sam D's one sounds really cool but I don't want to use the matrix because you can't start/stop the sound with keys, but with Tom's one you can easily do that.


For the audio I did some looking around on what else I could do. So I looked at all the audio objects in MAX/MSP to see if I'd need them. I don't need most of them because they couldn't do what I want to do, which is to start/stop audio with keys. In the end I found one that could to that, which was the dac~ object. You just need to add a bang toggle to it so that it starts/stops whenever a key is pressed.


The zip switches are all finished now. This is the connector, which is different to the original design. I'll explain further why it was changed in the journal.


And these are the spring switches. They worked quite well, though I think more can be improved.


It's important to plan, but a plan is never followed perfectly because there will always be unforeseen circumstances. Don't ever expect the end product to come out how you planned it to be. On the bright side it means that you learn more about working, being flexible and thinking of different solutions easily around obstacles you come across more readily.

Wednesday, May 4, 2011

Wearable Tech: Bits+Pieces


Compiled bits and pieces into one patch to have an overview of bits that I might be using. Will probably find more as I write the patch, I want to get this patch done, but I doubt it will go smoothly as any form of programming is not my strength. Doesn't mean I'll give up though. It will probably be easier to go looking around the net for patches and grabbing bits from other classmates and stick together bits and pieces. As always, all sources will be acknowledged.


This is the bit taken from Max help menu to find out the number of my keys so that I can put the keys in for specific actions in the program.


I spent all night tonight sewing the actual garment. It looks surprisingly good so I'm quite proud of it because I haven't sewn clothes in a long time. The last time was in college when I entered wearable arts. At that time I knew nothing about making clothes because it was my first time at it. So I'm really pleased with what I've got for the wearable device.


The next step would be to duct tape the wires to the middle bit over the chest and sew in the zip along with a final touch of fur. Before that I'll have to solder the springs on to each end of the switch and attach the metal wire on the slider in the zip as the connector.

Tuesday, May 3, 2011

Wearable Tech: Looking at patches and understanding them


Today I looked for tutorials and introductions on patches to refresh my mind from before the holidays. These ones were easiest to follow and they're the basic things I'll need to know for jitter.

The first one above was really good for getting to know the basic buttons that you can get and what you can do with them. It's really thorough as it's in step by step style. In pictures of the patches they show you it has comments explaining what's happening and what each button does as well so that made it a whole lot easier for me to understand.

This makes me think of programming for creativity to be honest. That class is confusing, hard to understand, and annoying for me. Mostly because I have no clue what the lectures are talking about and Daniel is rather confusing when he tries to explain things to me >.> It's hard to understand a giant wall of text projected on the screen which tries to be engaging but fails on multiple levels because it's incredibly boring. It tries to explain how to use a structure using a million slides when a page in the book can explain it to you and make you understand how. Worse, there are no pictures so 99% of the time you won't actually know what's happening. So then I don't want to make him feel bad by saying that straight to his face so I don't say anything >.> Which probably isn't good for anyone to be honest.

So yea, there's my mini rant on something that has nothing to do with the project D: Felt fantastic letting all that out though.


The second one
was specific to using jitter. That one shows you how to add a movie with movie controls like we did in class. Which is good because like the first introduction it does it step by step as well. This one really helped with remembering what we did before the holidays. It doesn't just show you what to do, it explains the little things in a general way so that you can apply it to other patches as well. After this one I found a tutorial on adding video effects to it. Just like we did in class, but easier to understand because you can read it at whatever pace you want and the pictures will still be there to help you. I'm not sure how useful this tutorial will be to me though because I won't be using cross fade to switch between horror graphics and the film. I would want and sharp cut for that for an appropriate shock effect on the audience. I think one thing I would need from the video effects tutorial would be the full screen one, because I've forgotten how to do that from class D: I think I still have the patch from that time though, so I can probably copy and paste from there.


I wanted to have some computer generated sound for the screen interaction. I remembered the keyboard thing that we did, and thought maybe it would be useful for me. I think if I do that then I can adapt it to do electric sounds. This is a tutorial on what we did in class on another website.

Will look for more patches to help me. I probably will be sticking together bits from patches that I need to make my patch, I will acknowledge all sources of course in a comment box within the patch. I will be sticking together the ones we made in class too.


It's fine to use bits and pieces from other places as long as you acknowledge where it came from and who made it. You'll have to understand how it works too.